One thing that made me curious about the 8 bit processors of the STM8 architecture was the little current consumption the devices have, when entering some low power modes. I hoped that getting started with 8-bit processors would be easy and the learning curve would be steep. An advantage of the STM8 Toolchain is the possibility to use the Gnu Debugger (GDB) to debug the code generated by the “Small Device C Compiler” (SDCC).
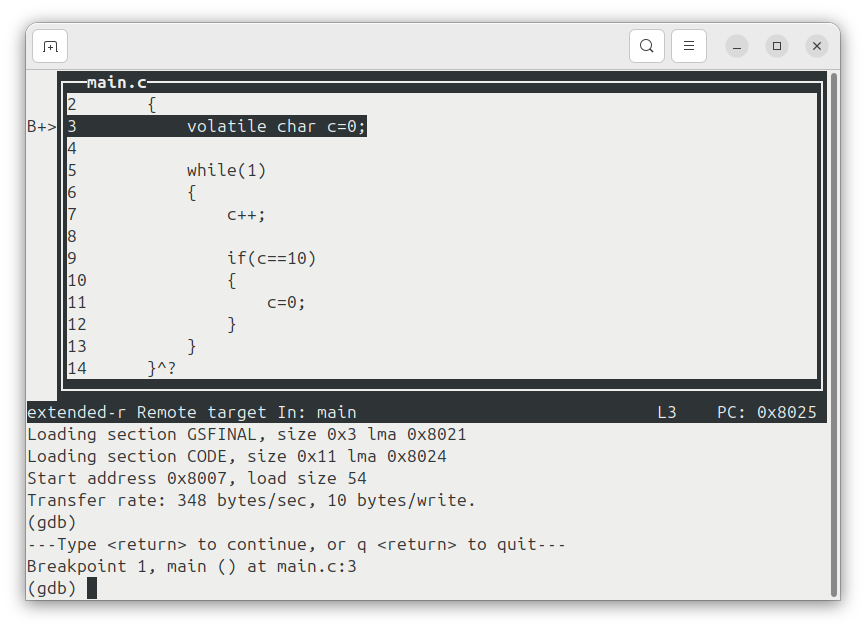
As I’m a friend of small and robust tools like text mode editors and bash scripts, I find the text user interface (TUI) of GDB a very useful tool. With this UI, it is very easy to debug c code even via Shell connections.
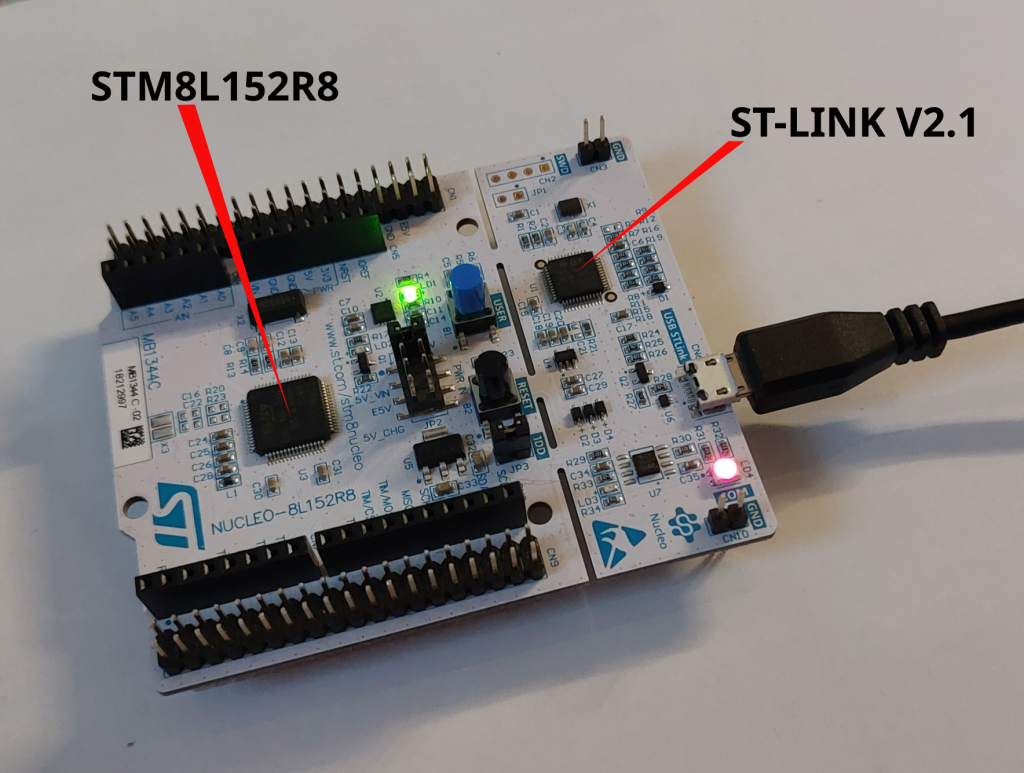
The Hardware: NUCLEO-8L152R8
For my research, I used the “NUCLEO-8L152R8” Board, which I got for less than 15€. The µC assembled, belongs to the “High-density and medium+ density STM8L15xx6/8” group, which is important to know, because there are differences between the “device-density”-groups concerning the implementation of some peripherals and the memory organisation.
STM8 : C-Compiler / Debugger / Flasher – the Tools to install (3 steps)!
When looking at my apt, I found that the compiler I need was already available through the packet magager:
1.) Installation with apt:
- SDCC (the Small Device C Compiler)
- OPENOCD debugging tool (with openocd, I use the config file “stlink.cfg” to detect my STM8 Nucleo Board)
There is a patch for the binutils software suite, with which the necessary utilities like the assembler or the object manipulation tools like objcopy coming along with an STM8-version of the Gnu Debugger (stm8-gdb) can be compiled for STM8 and usage with GDB with just a few commands.
2.) Download: https://sourceforge.net/projects/stm8-binutils-gdb/files/
I could easily compile and install this piece of software. After cd’ing into the un-zipped folder, I found the scripts to run:
./patch_binutils
./configure_binutils
cd binutils-2.30
make clean
make
sudo make install
After installation, we can “stm8- tab tab” and get:
stm8-addr2line  stm8-as         stm8-elfedit    stm8-gprof      stm8-ld.bfd     stm8-objcopy    stm8-ranlib     stm8-size       stm8-strip
stm8-ar         stm8-c++filt    stm8-gdb        stm8-ld         stm8-nm         stm8-objdump    stm8-readelf    stm8-strings
3.) Download: https://github.com/vdudouyt/stm8flash
Installation was as easy as:
make
make install
with the resulting stm8flash program:
stm8-addr2line  stm8-as         stm8-elfedit    stm8-gdb        stm8-ld         stm8-nm         stm8-objdump    stm8-readelf    stm8-strings
stm8-ar         stm8-c++filt    stm8flash       stm8-gprof      stm8-ld.bfd     stm8-objcopy    stm8-ranlib     stm8-size       stm8-strip
Hello World
As a debuggable minimal program, I used a main.c file with an endless loop inside the main function. SDCC needs main to return an int.
int main(void)
{
  volatile char c=0;
  while(1)
  {
    c++;
    if(c>10)
    {
      c=1;
    }
  }
}
I used the files in this Minimal Example .tgz-File:
- main.c (the Source Code I want to debug (above))
- domake.sh (my compile script)
- flash.sh (my flasher script)
- debug.sh (my debug script)
- gdb.commandscript (contains some instructions for GDB to start the target)
I used the three scritps “domake.sh“, “flash.sh” and “debug.sh” to control the code and the target:
“domake.sh” generates the binaries from the code twice: once with output-type “ELF” and once with output type “IHX”. The “ELF” File is used for debugging, while the IHX File is used for flashing. Before flashing, the “IHX” is converted to a “HEX” File with the packihx command.
“flash.sh” flashes the main.hex File into the microcontroller.
Running all that stuff
After compiling and flashing, I found that GDB’s TUI is running very good with the STM8 Setup. I can report that it took me some minutes to get the debugger run correctly. My solution is based on two independent builds of which one results in the ELF file and the other one generates the HEX file. With this setup, I can debug most parts of the microcontroller. Without explicit naming of the calling convention, I ran into trouble when calling functions in the debugger.